


A DIY wooden end table is a rewarding project that combines creativity, practicality, and craftsmanship. Whether you’re enhancing your living room decor with a personalized touch or seeking a budget-friendly alternative to store-bought furniture, creating your own end table allows you to tailor it to your style and needs. DIY projects like these can result in stunning pieces comparable to wooden living room tables or even bold designs like a wood and black side table. From compact tables for small spaces to a large end table with added functionality, this guide will walk you through the process, styles, uses, and benefits of making your wooden end table.
DIY Wooden End Table: Benefits of Creating Your Own Table
Personalization and Creativity
One of the primary benefits of a DIY wood end table is the opportunity to personalize every detail. From choosing the type of wood and finish to incorporating unique features like built-in storage or decorative elements, you have complete control over the design. This creative freedom allows you to craft a piece that reflects your personality and complements your existing decor. You can also experiment with innovative designs, blending traditional and contemporary elements to create a standout table.

Cost-Effective Solution
Building your own end table is often more affordable than purchasing a ready-made one. By sourcing materials locally or repurposing wood from old furniture, you can save money while reducing waste. Plus, a DIY project eliminates labor costs, making it a budget-friendly option for high-quality furniture. The satisfaction of knowing you’ve created a unique piece at a fraction of the cost of store-bought furniture adds to the value.
Skill Development and Satisfaction
Taking on a DIY project helps you develop valuable skills in woodworking, design, and problem-solving. Completing a project like a DIY wooden end table provides a sense of accomplishment and satisfaction, as you create something both functional and beautiful with your hands. These skills can also be applied to future projects, making DIY an enriching and lifelong hobby.

DIY Wood End Table: Popular Styles to Consider
Rustic Charm
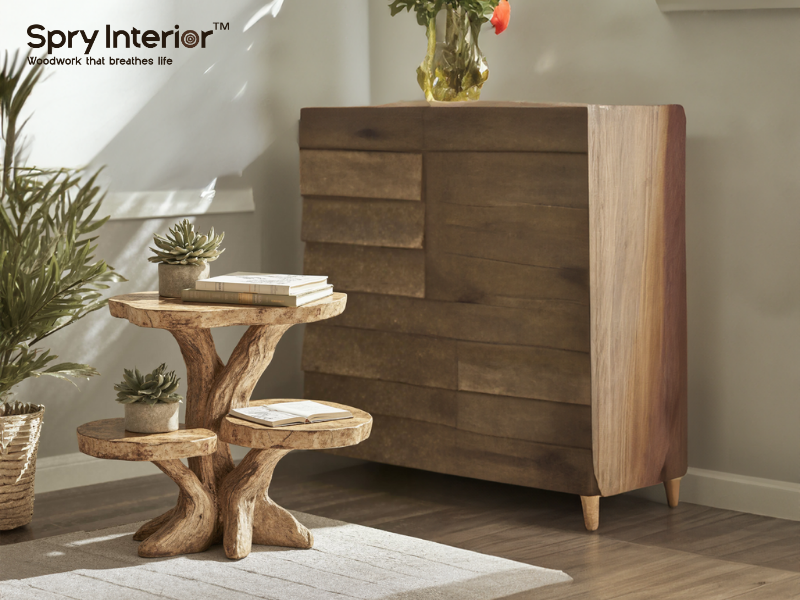
Rustic-style DIY wooden tables emphasize natural finishes, visible grain patterns, and earthy tones. This style is ideal for those seeking a cozy, farmhouse-inspired look. Using reclaimed wood or distressing techniques can add character and authenticity to your table. The incorporation of vintage hardware, such as antique knobs or metal accents, can further enhance its rustic appeal.
Modern Minimalism
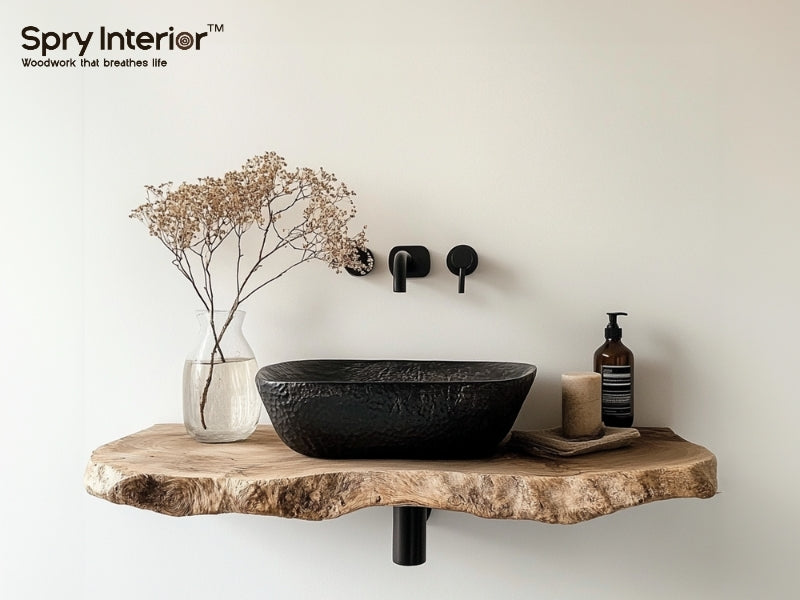
For a sleek and contemporary aesthetic, consider a modern minimalist design. These tables typically feature clean lines, smooth surfaces, and neutral tones. A wooden and black side table with minimalist elements pairs well with modern interiors, adding a touch of sophistication. You can experiment with geometric shapes or asymmetrical designs to elevate its modern appeal.

Multi-Functional Designs
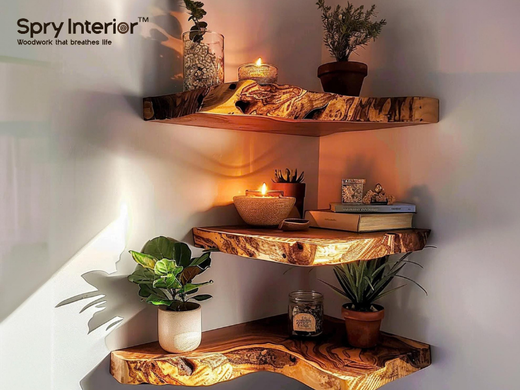
DIY projects allow you to incorporate multifunctionality into your design. Adding shelves, drawers, or a removable top can enhance the utility of your table. These features make your DIY wooden end table a versatile piece that adapts to your needs. For instance, a table with a hidden compartment can double as a storage solution, keeping your living space clutter-free.
DIY Wooden Table: Essential Tools and Materials
Tools Needed
- Saw: For cutting wood to the desired size and shape. A circular saw or jigsaw can be particularly helpful for intricate designs.
- Drill: Essential for assembling the table and adding hardware. A cordless drill is ideal for ease of use.
- Sander: To smooth the surfaces and edges for a polished finish. An electric sander speeds up the process.
- Measuring Tape and Square: Ensures accurate dimensions and straight cuts. Precision is key for a professional-looking result.
- Clamps: To hold pieces securely during assembly. Using multiple clamps ensures stability.
- Paintbrushes or Rollers: For applying paint, stain, or sealant. High-quality brushes leave a smoother finish.
Materials to Gather
- Wood: Choose the type based on your style, such as pine for affordability, oak for durability, or reclaimed wood for a rustic appeal. Hardwoods like maple or walnut add a luxurious touch.
- Screws and Nails: For secure assembly. Opt for weather-resistant screws if the table will be used outdoors.
- Wood Glue: Provides added stability to joints. Strong adhesive ensures a durable structure.
- Stain or Paint: To enhance the wood’s appearance and protect it from wear. Experiment with different finishes, such as matte or glossy.
- Sealant: Protects the finished table from moisture and scratches. Polyurethane is a popular choice for a long-lasting finish.

Optional Additions
- Decorative hardware, such as metal handles or brackets, for added character.
- Glass or tile inserts for a unique tabletop design.
- Casters or wheels for mobility, making the table versatile for different spaces.
DIY Wooden End Table: Step-by-Step Guide
Step 1: Plan Your Design
Start by sketching your desired design and determining the dimensions of your table. Consider the table’s purpose—whether it will function as a large wooden end table with storage or a compact side table for tight spaces. Take into account your existing furniture, such as wooden living room end tables, to ensure cohesion. Visualizing the design helps you plan the materials and tools needed.
Step 2: Prepare Materials
Cut the wood to the required dimensions using a saw. Sand each piece to smooth out rough edges and surfaces. If using reclaimed wood, ensure it’s free of nails, screws, or old finishes that may interfere with your project. Labeling the pieces after cutting can streamline the assembly process.

Step 3: Assemble the Frame
Construct the table frame by attaching the legs to the tabletop. Use wood glue for added stability and secure the joints with screws or nails. Clamps can hold pieces in place while the glue dries. Double-check alignment to ensure a sturdy and level table. Reinforce the frame with corner brackets for additional durability.
Step 4: Add Functional Features
Incorporate any additional elements, such as shelves or drawers, into your design. These features can be built separately and attached to the main frame. Ensure all components are securely fastened and functional. For a multi-functional table, consider adding a flip-top or hidden storage compartment.

Step 5: Finish the Table
Apply a stain or paint to enhance the wood’s appearance. Use a sealant to protect the surface from moisture, stains, and scratches. Allow the table to dry completely before placing it in your desired location. Multiple coats of stain or sealant may be necessary for outdoor tables.
DIY Wooden End Table: Why Choose SpryInterior for Guidance and Materials?
SpryInterior is your trusted partner for high-quality materials and expert advice on DIY projects. Here’s why you should choose us for your DIY wooden table:
High-Quality Materials
At SpryInterior, we provide premium-quality wood that’s perfect for DIY projects. Whether you’re crafting a rustic table or a modern wooden black side table, our selection includes durable and sustainably sourced materials that meet your needs. Our wood options cater to various styles, ensuring you find the perfect match.

Expert Guidance
Our team of experts is here to guide you through every step of your DIY project. From selecting the right wood and tools to providing tips on assembly and finishing, we ensure your project is a success. Our advice can help you achieve professional-level results, even as a beginner. Access to video tutorials and detailed guides simplifies the process.
Customization Options
If you’re looking for a hybrid approach, SpryInterior offers customization services that allow you to combine DIY elements with pre-made components. For example, you can build the frame while we provide a pre-finished tabletop, ensuring a seamless blend of your creativity and our craftsmanship. This flexibility allows you to focus on the aspects you enjoy most.
Conclusion
A DIY wooden end table is a rewarding project that combines functionality, creativity, and personal style. Whether you’re designing a piece to match your wooden living room tables, crafting a bold wooden black side table, or building a large wooden table with storage, the possibilities are endless. By choosing SpryInterior for materials and guidance, you ensure your project’s success with high-quality resources and expert advice. Start your DIY journey today and transform your space with a unique, handcrafted end table that reflects your vision and skill. With SpryInterior’s support, your DIY table will be a centerpiece that combines beauty, utility, and a personal touch.
Leave a comment
This site is protected by hCaptcha and the hCaptcha Privacy Policy and Terms of Service apply.